
Download
Step 1. Add the JitPack repository to your build file
Add it in your root settings.gradle at the end of repositories:
	dependencyResolutionManagement {
		repositoriesMode.set(RepositoriesMode.FAIL_ON_PROJECT_REPOS)
		repositories {
			mavenCentral()
			maven { url 'https://jitpack.io' }
		}
	}
Add it in your settings.gradle.kts at the end of repositories:
	dependencyResolutionManagement {
		repositoriesMode.set(RepositoriesMode.FAIL_ON_PROJECT_REPOS)
		repositories {
			mavenCentral()
			maven { url = uri("https://jitpack.io") }
		}
	}
Add to pom.xml
	<repositories>
		<repository>
		    <id>jitpack.io</id>
		    <url>https://jitpack.io</url>
		</repository>
	</repositories>
Add it in your build.sbt at the end of resolvers:
resolvers += "jitpack" at "https://jitpack.io"
Add it in your project.clj at the end of repositories:
:repositories [["jitpack" "https://jitpack.io"]]
Step 2. Add the dependency
	dependencies {
		implementation 'com.github.ericwjr:vertical-stepper-form:1.0.11'
	}
dependencies {
implementation("com.github.ericwjr:vertical-stepper-form:1.0.11")
} <dependency>
<groupId>com.github.ericwjr</groupId>
<artifactId>vertical-stepper-form</artifactId>
<version>1.0.11</version>
</dependency>
libraryDependencies += "com.github.ericwjr" % "vertical-stepper-form" % "1.0.11"
:dependencies [[com.github.ericwjr/vertical-stepper-form "1.0.11"]]
Readme
Vertical Stepper Form Library
This Android library implements a vertical stepper form following Google Material Design guidelines. #####Disclaimer
There may be slight differences between the official Material Design specifications and the implementation of this library.
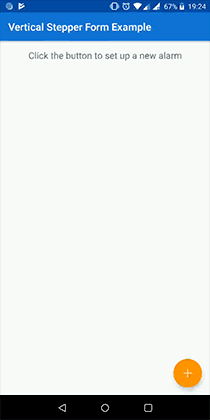
Demo
Examples

What's new
Version 0.9.9
- Dimensions are specified in an XML file so they can be overriden
- Subtitles can be added in each step by calling
stepsSubtitles()in the builder - Titles and subtitles can be modified after the form has been initialized thanks to
setStepTitle()andsetStepSubtitle() - Official Material Design appearance can be applied to disabled/not visited steps by calling
materialDesignInDisabledSteps(true)in the builder - The hiding of the software keyboard that is carried out by default every time a step is open can be avoided by calling
hideKeyboard(false)in the builder - Now it is possible to force the vertical line to be displayed between collapsed steps by calling
showVerticalLineWhenStepsAreCollapsed(true)in the builder
Version 0.9.8
- Easier to set up (Builder Pattern has been implemented)
- Navigation bar on the bottom can be hidden in order to make the form follow Material Design guidelines more precisely
- Optional error messages for each step
- Smoother transitions
- Tick icon displayed on completed steps
- Javadoc documentation of the most important methods
Installation and usage
-
To include the library in your project, first add it via Gradle:
dependencies { compile 'com.ernestoyaquello.stepperform:vertical-stepper-form:0.9.9' } -
Now, you have to add a
VerticalStepperFormLayoutview to your activity layout, which will contain the vertical stepper form. For design purposes, it is recommended that you don't put anything else than this view in your activity layout (see the code below).<RelativeLayout xmlns:android="http://schemas.android.com/apk/res/android" xmlns:tools="http://schemas.android.com/tools" android:layout_width="match_parent" android:layout_height="match_parent" tools:context=".StepperExampleActivity"> <ernestoyaquello.com.verticalstepperform.VerticalStepperFormLayout android:id="@+id/vertical_stepper_form" android:layout_width="match_parent" android:layout_height="match_parent" android:layout_alignParentTop="true"/> </RelativeLayout> -
In
onCreate(), you will need to find the view and initialize the form:private VerticalStepperFormLayout verticalStepperForm; ... @Override protected void onCreate(Bundle savedInstanceState) { super.onCreate(savedInstanceState); setContentView(R.layout.your_activity_layout); String[] mySteps = {"Name", "Email", "Phone Number"}; int colorPrimary = ContextCompat.getColor(getApplicationContext(), R.color.colorPrimary); int colorPrimaryDark = ContextCompat.getColor(getApplicationContext(), R.color.colorPrimaryDark); // Finding the view verticalStepperForm = (VerticalStepperFormLayout) findViewById(R.id.vertical_stepper_form); // Setting up and initializing the form VerticalStepperFormLayout.Builder.newInstance(verticalStepperForm, mySteps, this, this) .primaryColor(colorPrimary) .primaryDarkColor(colorPrimaryDark) .displayBottomNavigation(true) // It is true by default, so in this case this line is not necessary .init(); ... }NOTE: In this step you may need need to import
ernestoyaquello.com.verticalstepperform.*. -
Finally, edit your activity class to make it implement
VerticalStepperForm. Then, implement the methodscreateStepContentView(),onStepOpening()andsendData().
###Implementing the methods ####createStepContentView() This method will be called automatically by the system to generate the view of the content of each step. You have to implement the generation of the corresponding step view and return it:
@Override
public View createStepContentView(int stepNumber) {
	View view = null;
	switch (stepNumber) {
		case 0:
			view = createNameStep();
			break;
		case 1:
			view = createEmailStep();
			break;
		case 2:
			view = createPhoneNumberStep();
			break;
	}
	return view;
}

private View createNameStep() {
	// Here we generate programmatically the view that will be added by the system to the step content layout
	name = new EditText(this);
	name.setSingleLine(true);
	name.setHint("Your name");
	...
	return name;
}

private View createEmailStep() {
	// In this case we generate the view by inflating a XML file
	LayoutInflater inflater = LayoutInflater.from(getBaseContext());
	LinearLayout emailLayoutContent = (LinearLayout) inflater.inflate(R.layout.email_step_layout, null, false);
	email = (EditText) emailLayoutContent.findViewById(R.id.email);
	...
	return emailLayoutContent;
}

private View createPhoneNumberStep() {
	LayoutInflater inflater = LayoutInflater.from(getBaseContext());
	LinearLayout phoneLayoutContent = (LinearLayout) inflater.inflate(R.layout.phone_step_layout, null, false);
	...
	return phoneLayoutContent;
}
####onStepOpening() This method will be called every time a step is open, so it can be used for checking conditions. It is noteworthy that the button "Continue" is disabled by default in every step, so it will only show up after certain user actions (for example, after the introduction of a correct name or email):
@Override
public void onStepOpening(int stepNumber) {
	switch (stepNumber) {
		case 0:
			checkName();
			break;
		case 1:
			checkEmail();
			break;
		case 2:
			// As soon as the phone number step is open, we mark it as completed in order to show the "Continue"
			// button (We do it because this field is optional, so the user can skip it without giving any info)
			verticalStepperForm.setStepAsCompleted(2);
			// In this case, the instruction above is equivalent to:
			// verticalStepperForm.setActiveStepAsCompleted();
			break;
	}
}

private void checkName() {
	if(name.length() >= 3 && name.length() <= 40) {
		verticalStepperForm.setActiveStepAsCompleted();
	} else {
		// This error message is optional (use null if you don't want to display an error message)
		String errorMessage = "The name must have between 3 and 40 characters";
		verticalStepperForm.setActiveStepAsUncompleted(errorMessage);
	}
}

private void checkEmail() {
	...
}
NOTE: You can also use this method to trigger some actions whenever a certain step is open.
####sendData() In this method you have to implement the sending of the data.
Screen rotation
This library handles screen rotation by saving and restoring the state of the form. Therefore, if you want to use onSaveInstanceState() and onRestoreInstanceState(), don't forget to call super() at the end:
@Override
public void onSaveInstanceState(Bundle savedInstanceState) {
	...
	super.onSaveInstanceState(savedInstanceState);
}

@Override
public void onRestoreInstanceState(Bundle savedInstanceState) {
	...
	super.onRestoreInstanceState(savedInstanceState);
}
Further details
Check out the example application code.
Contribution
Feel free to contribute to this library and help to improve it!
Special thanks to Csaba Kozák for his collaboration :)
License
Licensed under the Apache License, Version 2.0 (the "License");
you may not use this file except in compliance with the License.
You may obtain a copy of the License at

   http://www.apache.org/licenses/LICENSE-2.0

Unless required by applicable law or agreed to in writing, software
distributed under the License is distributed on an "AS IS" BASIS,
WITHOUT WARRANTIES OR CONDITIONS OF ANY KIND, either express or implied.
See the License for the specific language governing permissions and
limitations under the License.