 jaakkos/ev3dev-lang-java
A project to learn Java and create software for Mindstorms Robots using EV3Dev & the LeJOS way http://ev3dev-lang-java.github.io/

Download
Step 1. Add the JitPack repository to your build file
Add it in your root settings.gradle at the end of repositories:
	dependencyResolutionManagement {
		repositoriesMode.set(RepositoriesMode.FAIL_ON_PROJECT_REPOS)
		repositories {
			mavenCentral()
			maven { url 'https://jitpack.io' }
		}
	}
Add it in your settings.gradle.kts at the end of repositories:
	dependencyResolutionManagement {
		repositoriesMode.set(RepositoriesMode.FAIL_ON_PROJECT_REPOS)
		repositories {
			mavenCentral()
			maven { url = uri("https://jitpack.io") }
		}
	}
Add to pom.xml
	<repositories>
		<repository>
		    <id>jitpack.io</id>
		    <url>https://jitpack.io</url>
		</repository>
	</repositories>
Add it in your build.sbt at the end of resolvers:
resolvers += "jitpack" at "https://jitpack.io"
Add it in your project.clj at the end of repositories:
:repositories [["jitpack" "https://jitpack.io"]]
Step 2. Add the dependency
	dependencies {
		implementation 'com.github.jaakkos:ev3dev-lang-java:0.7.3-SNAPSHOT'
	}
dependencies {
implementation("com.github.jaakkos:ev3dev-lang-java:0.7.3-SNAPSHOT")
} <dependency>
<groupId>com.github.jaakkos</groupId>
<artifactId>ev3dev-lang-java</artifactId>
<version>0.7.3-SNAPSHOT</version>
</dependency>
libraryDependencies += "com.github.jaakkos" % "ev3dev-lang-java" % "0.7.3-SNAPSHOT"
:dependencies [[com.github.jaakkos/ev3dev-lang-java "0.7.3-SNAPSHOT"]]
Readme
ev3dev-lang-java
EV3Dev-lang-Java is a Java project designed to build Software for Robots with EV3Dev hardware & the LeJOS way.
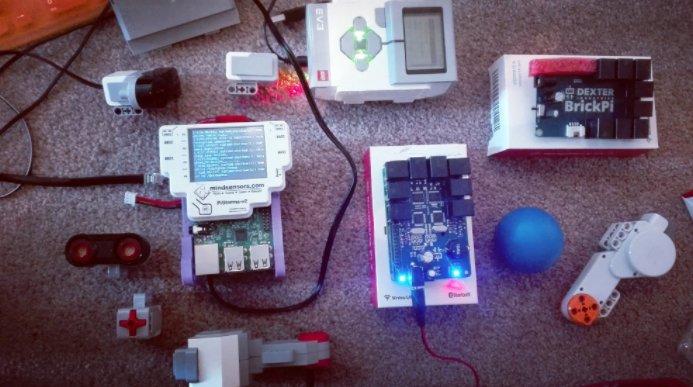
![]()

What is the latest EV3Dev version supported?
THe libraries was tested with the latest stable EV3Dev versions for Debian Jessie:
- EV3 Brick: 4.4.47-19-ev3dev-ev3
- RaspberryPi 3 with BrickPi3 & PiStorms: 4.4.47-19-ev3dev-rpi2
If you need further information about stable EV3Dev images, click here
Introduction
In Lego Mindstorms ecosystem, the default solution to develop Java software for Lego Mindstorms is LeJOS.
But now exists one alternative, EV3Dev-lang-java a Java project running on the top of EV3Dev.
Lego Mindstorms ecosystem is a nice educational way to learn Java programming in general and Robotics in particular.
Now, it is possible to install a complete Linux distro in the third generation of the product and others companies like
Mindsensors & Dexter Industries has released products
which interact with Sensors & Actuators from Lego ecosystem and that boards can use the Power of the popular board
Raspberry Pi 3
But, with the help of EV3Dev, it is possible to have the same Linux experience for multiple boards.
So... why not develop a Java library for that Linux Distro? The answer is EV3Dev-lang-java.
The project, takes the good things of both worlds: EV3Dev with the complete linux experience
and LeJOS with the rich local navigation stack.
What libraries contains EV3Dev-lang-java?
The project contains the following Java libraries/scripts:
- EV3Dev-lang-java: Low level interation with EV3Dev
- lejos-commons: LeJOS interfaces & utilities
- lejos-navigation: LeJOS navigation stack
- RPLidar4J: RPLidar A1 support
- Battery Monitor: A battery monitor to protect your hardware against low battery levels
- Installer: A set of Bash scripts to automate some operations with your brick
Advantages of the usage of this project?
Basically, with this library you can develop educational robots with Java for multiple bricks:
- EV3 Brick
- BrickPi+
- BrickPi 3 (Scheduled on v0.7.0)
- PiStorms
Using the same objects, it is possible to deploy the software for robots on EV3 Brick, Raspberry Pi 3 with BrickPi & PiStorms.
If you analyze the hardware, any EV3 Brick uses a SoC: Sitara Processor AM1808 (from year 2010) to manage Sensors & Actuators
but now with the usage of a BrickPi/PiStorms unit, it is possible to use the power of a Raspberry Pi 3 increasing the
possibilities to develop complex projects which require por Computational consumption.
2010 Chip included on EV3 Brick:
SoC: Sitara Processor AM1808
CPU: ARM9 300MHz
RAM: 16KB of Instruction Cache, 16KB of Data Cache ,8KB of RAM (Vector Table), 64KB of ROM
2016 Chip included on Raspberry Pi 3:
SoC: Broadcom BCM2837
CPU: 4× ARM Cortex-A53, 1.2GHz
RAM: 1GB LPDDR2 (900 MHz)
Features included in the whole project
Java features
- Automatic installation of Oracle Java JDK 8 for Brickpi+/PiStorms + Raspberry Pi 3
- Partial installation of Oracle Java JRE 8 for EV3 Brick
- OpenJDK Java 9 EA support for Brickpi+/PiStorms + Raspberry Pi 3
- Java profiling tools Support (Oracle mission control & JConsole)
- Logging support based on SLF4J
- Centralized logs with Kibana
Platform features
- Support for EV3 Brick, PiStorms v1/v2, BrickPi+ & BrickPi 3
Lego Mindstorms features
- Regulated Motor Support
- Unregulated Motor Support
- Sensor Support (EV3 sensors)
- Sounds Support
- EV3 LCD Support
Robotics
- Automatic installation of OpenCV
- eSpeak TTS (Text to speech) Support
- LeJOS Sensor filter Support
- LeJOS local navigation stack Support
- RPLidar A1 (2D Lidar) Support
Roadmap
Review the backlog to follow the features in course:
https://github.com/ev3dev-lang-java/ev3dev-lang-java/issues
Getting Started
1. Install EV3Dev on your brick
Follow the link to install EV3Dev on your brick:
http://www.ev3dev.org/docs/getting-started/
Once you finish the installation process and the remote ssh connection test,
you will have a complete Linux distro to run any Programming language.
Note: Please, maintain your brick updated. Execute the following commands before jump to the next step in this guide.
sudo apt-get update
sudo apt-get upgrade
sudo apt-get dist-upgrade
sudo reboot
2. Install Java on your brick
For this step exist 2 paths. One path is for EV3 Brick and another path for BrickPi users and PiStorms users.
2.1 EV3 Brick:
The EV3 Brick was designed with a SOC based on ARM EABI
and the best JVM option for that hardware architecture is the Oracle JRE 8 to install in the brick but, it is not possible to install directly in the brick
without any human interaction, so you need to download from here
and later, copy the file ejdk-8-fcs-b132-linux-arm-sflt-03_mar_2014.tar.gz to your brick using the command scp.
Example:
scp "./ejdk-8-fcs-b132-linux-arm-sflt-03_mar_2014.tar.gz" "robot@192.168.1.85:/home/robot"
Once, you have the file on the brick, you can continue the Java installation with the installer or do yourself manually.
https://github.com/ev3dev-lang-java/installer
Using the installer:
cd /home/robot
mkdir installer
cd installer
wget -N https://raw.githubusercontent.com/ev3dev-lang-java/installer/develop/installer.sh
chmod +x installer.sh
sudo ./installer.sh help
sudo ./installer.sh
Manual way:
tar -zxvf "/home/robot/ejdk-8-fcs-b132-linux-arm-sflt-03_mar_2014.tar.gz" -C /opt
sudo update-alternatives --install /usr/bin/java java /opt/ejdk1.8.0/linux_arm_sflt/jre/bin/java 1
java -version
Now, you have Java on your EV3 Brick
2.2 BrickPi+ / PiStorms:
Using the installer, it is possible to automate everything:
https://github.com/ev3dev-lang-java/installer
cd /home/robot
mkdir installer
cd installer
wget -N https://raw.githubusercontent.com/ev3dev-lang-java/installer/develop/installer.sh
chmod +x installer.sh
sudo ./installer.sh help
sudo ./installer.sh
3. Create your first Project and deploy on your Brick
Once you have the required infrastructure on your Brick, it is possible to experiment with the libraries in some ways:
3.1 Using a Gradle template project
If you like, you can experiment with the project, using the following project template:
https://github.com/ev3dev-lang-java/template_project_gradle
Download the project, update the file: config.gradle: with the IP of you Brick:
remotes {
    ev3dev {
        host = '10.0.1.3'
        user = 'robot'
        password = 'maker'
    }
}
To deploy the example on your brick, open a terminal and type:
./gradlew deployAndRun
Besides, exist a task to provide access to a Profiling tool if you execute:
./gradlew deployAndProfilingRun
3.2 Create a project from scratch:
Another alternative is the creation of a project from Scratch using Maven/Gradle.
To start a new project with this library, add the following repository and dependency.
<repositories>
    <repository>
        <id>jitpack.io</id>
        <url>https://jitpack.io</url>
    </repository>
</repositories>
<dependency>
    <groupId>com.github.ev3dev-lang-java</groupId>
    <artifactId>ev3dev-lang-java</artifactId>
    <version>v0.6.1</version>
</dependency>
Further information about the Maven dependency: https://jitpack.io/#ev3dev-lang-java/ev3dev-lang-java/v0.6.1
Examples
Take a look the following examples to discover some features included with this Java project.
EV3Dev-lang-Java:
- ev3dev.misc
- BumperCar
- BumperCar2
- ev3dev.robotics.tts
- TTSDemo
- TTSDemo2
- ev3dev.actuators
- LCDDrawIconsTest
- LCDDrawImagesTest
- LCDDrawLinesTest
- LCDDrawRectanglesTest
- LCDFontTest
- LCDTest
- LCDWriteTextTest
- SoundDemo
- ev3dev.actuators.ev3
- LEDExample
- ev3dev.actuators.lego.motors
- LargeMotorDemo
- LargeMotorDemo2
- MediumMotorDemo
- MotorEventTest
- MultipleMotorsDemo
- MultipleMotorsStopDemo
- RegulatedMotorRotateDemo
- RegulatedMotorRotateDemo
- RegulatedMotorRotateToDemo
- UnregulatedMotorDemo
- UnregulatedMotorDemo2
- UnregulatedMutilpleMotorDemo
- ev3dev.sensors
- BatteryDemo
- ButtonExample
- ev3dev.sensors.ev3
- ColorSensorDemo
- ColorSensorDemo2
- ColorSensorDemo3
- ColorSensorMultipleDemo
- GyroSensorDemo
- GyroSensorDemo2
- GyroSensorDemo3
- IRSensorDemo
- IRSensorDemo2
- IRSensorDemo3
- TouchSensorDemo
- USSensorDemo
- USSensorDemo2
- ev3dev.hardware
- PlatformTest
lejos-commons:
- lejos.commons.subsumption
- BumperCar
- DriveForward
- HitWall
lejos-navigation:
- lejos.robotics.navigation
- PilotConfig
- PilotConfig2
- DifferentialPilotStopTest
- DifferentialPilotTest1
- DifferentialPilotTest9
- MoveControllerTest1
- MoveControllerTest2
- NavigatorTest1
- NavigatorTest2
- NavigatorTest3
- NavigatorTest4
- lejos.robotics.objectdetection
- FeatureAvoider
- FeatureAvoider2
- FeatureAvoider3
Videos
- https://www.youtube.com/watch?v=Gxew3aNH6ks
- https://www.youtube.com/watch?v=1d9q24aNMHQ
- https://www.youtube.com/watch?v=SIwG848ODI8
Unit testing
Exist many examples used to test the project. In the future we will automate a good % of the tests using JUnit testing and Mocks but at the moment, many features are tested manually.
UML Design

References:
- LeJOS: http://www.lejos.org/
- LeJOS Git: http://sourceforge.net/p/lejos/ev3/code/ci/master/tree/
- LeJOS Forum: https://lejos.sourceforge.io/forum/search.php?keywords=ev3dev&sid=8642d9d1b361bcfdcdeabb26db89e632
- EV3Dev: http://www.ev3dev.org/
- EV3Dev // Getting Started: http://www.ev3dev.org/docs/getting-started/
- EVEDev // Linux Kernel Drivers: http://docs.ev3dev.org/projects/lego-linux-drivers/en/ev3dev-jessie/
- Dexter Forum: http://forum.dexterindustries.com/search?q=java