
Download
Step 1. Add the JitPack repository to your build file
Add it in your root settings.gradle at the end of repositories:
	dependencyResolutionManagement {
		repositoriesMode.set(RepositoriesMode.FAIL_ON_PROJECT_REPOS)
		repositories {
			mavenCentral()
			maven { url 'https://jitpack.io' }
		}
	}
Add it in your settings.gradle.kts at the end of repositories:
	dependencyResolutionManagement {
		repositoriesMode.set(RepositoriesMode.FAIL_ON_PROJECT_REPOS)
		repositories {
			mavenCentral()
			maven { url = uri("https://jitpack.io") }
		}
	}
Add to pom.xml
	<repositories>
		<repository>
		    <id>jitpack.io</id>
		    <url>https://jitpack.io</url>
		</repository>
	</repositories>
Add it in your build.sbt at the end of resolvers:
resolvers += "jitpack" at "https://jitpack.io"
Add it in your project.clj at the end of repositories:
:repositories [["jitpack" "https://jitpack.io"]]
Step 2. Add the dependency
	dependencies {
		implementation 'com.github.pepebecker:chat-sdk-android:4.8.3-5'
	}
dependencies {
implementation("com.github.pepebecker:chat-sdk-android:4.8.3-5")
} <dependency>
<groupId>com.github.pepebecker</groupId>
<artifactId>chat-sdk-android</artifactId>
<version>4.8.3-5</version>
</dependency>
libraryDependencies += "com.github.pepebecker" % "chat-sdk-android" % "4.8.3-5"
:dependencies [[com.github.pepebecker/chat-sdk-android "4.8.3-5"]]
Readme
Chat SDK for Android
Open Source Messaging framework for Android
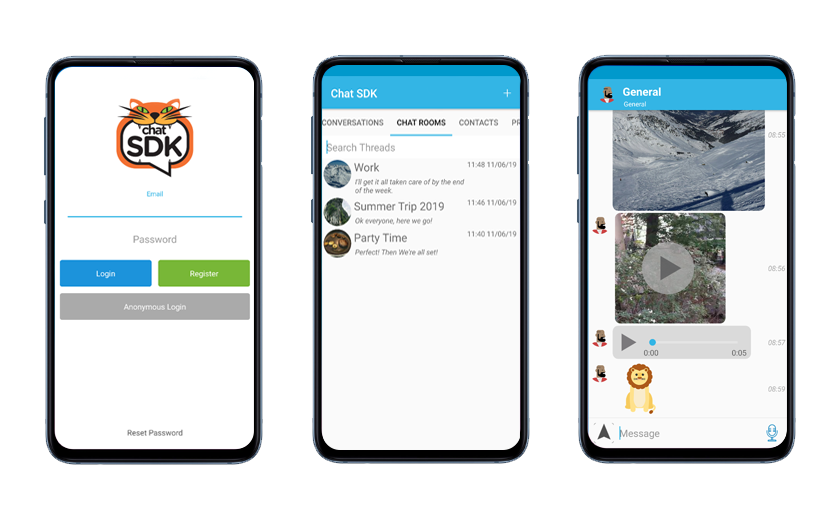
Chat SDK is a fully featured open source instant messaging framework for Android. Chat SDK is fully featured, scalable and flexible and follows the following key principles:
- Free. The Chat SDK is free for commercial use
- Open Source. The Chat SDK is open source
- Full control of the data. You have full and exclusive access to the user's chat data
-
Quick integration. Chat SDK is fully featured out of the box
<!--- Install the demo **[Firebase](https://i.diawi.com/2JGr4o)** app now by clicking the link on your Android phone! --> - Demo Versions. XMPP open this link on your Android phone to install
- Scalable. Supports millons of daily users [1, 2]
- Backend agnostic. Chat SDK can be customized to support any backend

Technical details
- Multiple backend support Firebase, ejabberd, OpenFire
- Data storage all data is persisted using the GreenDao
- Dynamic image loading using Fresco
- Reactive using RXAndroid
- Java 8 supports Java 8 and lamda expressions
- API Level 16+ Compatible with 99.3% of Android devices
Features
- Private and group messages
- Public chat rooms
- Username / password, Facebook, Twitter, Anonymous and custom login
- Phone number authentication
- Push notifications (using FCM)
- Text, Image and Location messages
- User profiles
- User search
- Powered by Firebase
- Firebase UI
- iOS Version
- Web Version
Quick Start
- Standard Documentation
- Full step-by-step guide (Good for beginners)
- New Video Series: Part 1, Part 2, Part 3
- UI Customization
- API Documentation
- Code Examples
Performance and Scalability
These are the average Firebase hosting costs calculated using the Firebase Database Profiling tool. Firebase charge 1 USD per GB of data downloaded (excluding images or files). We've tabulated a few common operations and how many of them can be performed per 1 USD of monthly hosting cost:
- Messages Received (1kb) = 1,000,000
- Logins (10kb) = 100,000
- Profile Update (0.2kb) = 5,000,000
- User search (2kb) = 500,000
What's possible on the Firebase free plan (10GB / month):
500k logins, 5 million messages.
What's possible on the Flame plan (20GB / month / 20 USD):
1 million logins, 10 million messages.
The real-time database will support up to 100k concurrent users. From our experience, 1 concurrent connection is enough to support 10 users per minute. That means that at peak capacity, the Chat SDK could support 1 million users per minute and well over 20 million monthly users.
Modules
The Chat SDK has a number of additional modules that can easily be installed including:
- End-To-End Encryption
- File Messages
- Typing indicator
- Read receipts
- Location based chat
- Last Online Indicator
- Audio messages
- Video messages
- Sticker messages
- Contact book integration
- User Blocking
- Social Login (free)
- Push Notifications (free)
- File Storage (free) (Included in basic setup instructions)
- Firebase UI (free) (Included in basic setup instructions)
Firebase Firestore
If you are interested in a version of the Chat SDK that supports Firebase's new database please vote on this issue and help us meet our target on Patreon.
Support the project
We would love to work full time developing the open source. At the moment we have to spend a substantial amount of time doing other consulting work to cover our costs. If you like what we're doing and would like to support us to focus more of our time on the open source project we would be very grateful.
- Support us directly on Patreon 🙏
- Giving us a Github star ⭐
- Upvoting our page on Product Hunt
- Tweet about the project using @chat_sdk
Get involved!
We're very excited about the project and we're looking for other people to get involved. Over time we would like to make the best messaging framework for mobile. Helping us could involve any of the following:
- Providing feedback and feature requests
- Reporting bugs
- Fixing bugs
- Writing documentation
- Improving the user interface
- Help us update the library to use Swift
- Helping to write adapters for other services such as Layer, Pusher, Pubnub etc...
- Write a tutorial - we pay $100 for quality tutorials
If you're interested please review the Contributing Document for details of our development flow and the CLA then email me at team@sdk.chat.
Apps that use Chat SDK
If you have an app that uses the Chat SDK let us know and we'll add a link.
Updating from 4.7.x to 4.8.x
The latest update brings a range of improvements and new features including:
- Detailed profile screen:
- User status
- User availability
- Country
- Update to message view
- Efficiency improvements
- Screens updated to use Material Design
There are also a range of bug fixes and overall improvments. If we aren't able to document all the changes but if you have any issues updating your project, you can post on this issue and we will answer your questions.
The security rules have also been updated so make sure to bring your project up to date.
Several schema have also been deprecated and will be removed at some point in the future. These include:
message/tofield addedmessage/metawill replacejson_v2message/fromwill replaceuser-firebase-idthread/metawill replacedetailsthread/meta/creatorwill replacecreator-entity-idthread/meta/typewill replacetype_v4
At the moment these fields are not being used and are only included for future compatibility. However, in a future version of the client, the old fields will be removed and any old versions of the client will stop working.
Running the demo project
This repository contains a fully functional version of the Chat SDK which is configured using our Firebase account and social media logins. This is great way to test the features of the Chat SDK before you start integrating it with your app.
Note: You should make sure that the correct SDK versions and build tools are installed in Android Studio. To do this open the Preferences panel and navigate to Appearance & Behavour -> System Settings -> Android SDK or click on the SDK Manager icon in the tool bar. Android SDK versions 8.1 and onwards should be installed. Android SDK Build-Tools version that is defined in the
gradle.propertiesfile under theANDROID_BUILD_TOOLS_VERSIONproperty.
The next step is to setup the Chat SDK using your Firebase and Social Accounts. To do that continue here.
Setup Service
We provide extensive documentation on Github but if you’re a non-technical user or want to save yourself some work you can take advantage of our setup and integration service.
Adding the Chat SDK to your project
Quick start guide - it takes about 10 minutes!
Integration with an existing project is simple. You can add the core libraries using Gradle.
Gradle
Until the project is published in jCenter, you will need to include the repository manually:
repositories {
    maven { url "http://dl.bintray.com/chat-sdk/chat-sdk-android" }
    maven { url "https://maven.google.com" }
    maven { url "https://jitpack.io" }
}
Then add this to your dependencies area:
compile 'co.chatsdk.chatsdk:chat-sdk-core:4.8.3'
compile 'co.chatsdk.chatsdk:chat-sdk-ui:4.8.3'
compile 'co.chatsdk.chatsdk:chat-sdk-firebase-adapter:4.8.3'
compile 'co.chatsdk.chatsdk:chat-sdk-firebase-file-storage:4.8.3'
You may also need to enable Java 8:
compileOptions {
    sourceCompatibility JavaVersion.VERSION_1_8
    targetCompatibility JavaVersion.VERSION_1_8
}
You can also add the modules manually by downloading source code and importing the modules to Android Studio.
Firebase depends on Google Services so we need to apply the google services plugin. This will read the Google Services file that we will add during Firebase setup. Add this to your top level build.gradle file.
buildscript {
    repositories {
        jcenter()
    }
    dependencies {
        classpath 'com.google.gms:google-services:4.0.1'
    }
}
Add this to the end of your app level build.gradle file:
apply plugin: 'com.google.gms.google-services'
Android X
Make sure you've added the following to your gradle.properties file:
android.useAndroidX=true
android.enableJetifier=true
Initializing the Chat SDK
Now open your applications's main class and find the onCreate method. Add the following to setup the Chat SDK:
Context context = getApplicationContext();

try {
    // Create a new configuration
    Configuration.Builder builder = new Configuration.Builder(context);

    // Perform any other configuration steps (optional)
    builder.firebaseRootPath("prod");

    // Initialize the Chat SDK
    ChatSDK.initialize(builder.build(), new FirebaseNetworkAdapter(), new BaseInterfaceAdapter(context));

    // File storage is needed for profile image upload and image messages
    FirebaseFileStorageModule.activate();

    // Push notification module
    FirebasePushModule.activate();

    // Activate any other modules you need.
    // ...

} catch (ChatSDKException e) {
    // Handle any exceptions
    e.printStackTrace();
}
Activate the core Chat SDK modules and any other modules you need. See the module setup guide for more information.
Launch the Chat SDK login activity by adding this to your AndroidManifest.xml:
<activity android:name="co.chatsdk.ui.login.SplashScreenActivity">
    <intent-filter>
        <action android:name="android.intent.action.MAIN" />
        <category android:name="android.intent.category.LAUNCHER" />
    </intent-filter>
</activity>
Or if you want to launch the activity manually, you can do it using:
ChatSDK.ui().startSplashScreenActivity(context);
Firebase Setup
- Go to the Firebase website and sign up or log in
- Go to the Firebase console and make a new project
- Click Add project
- Choose a name and a location
- Click Settings (the gear icon). On the General tab, click Add App -> Add Firebase to your Android app
- Enter your package name - found in your app's
build.gradlefile, app name and SHA-1 key (optional) - Download the google-services.json file and add it to your app project. It should be added inside the
appfolder. - Set a custom root path. The chat SDK allows you to run multiple chat instances on one Firebase database. This could be useful if you want test and production environments for example. To do this set
builder.firebaseRootPath("prod")in the configuration builder. - In the Firebase dashboard click Authentication -> Sign-in method and enable all the appropriate methods
Security Rules
Firebase secures your data by allowing you to write rules to govern who can access the database and what can be written. The rules are also needed to enable user search. To enable the rules see the guide Enabling Security Rules.
Push Notifications
Follow the instructions on our Chat SDK Firebase repository
Then add the following to your build.gradle
Add the library
Gradle
compile 'co.chatsdk.chatsdk:chat-sdk-firebase-push:4.8.3'
compile project(path: ':chat-sdk-firebase-push')
Enable the module
In your main class onCreate method add:
FirebasePushModule.activate();
Enabling location messages
The Chat SDK needs two google services to support location messages. The Google Places API to select the location and the Google Static Maps API to display the location.
Add the following during the configuration stage:
builder.googleMaps("YOUR GOOGLE MAPS STATIC API KEY");
You will also need to add your Google Places API key to the app manifest:
<meta-data android:name="com.google.android.geo.API_KEY" android:value="YOUR GOOGLE PLACES API KEY"/>
Note: You need to enable billing in your google cloud console or else you will not be able to view map images in your messages, For more information visit the Google usage and billing support page
You can disable location messages using the builder.locationMessagesEnabled(false) option.
Conclusion
Congratulations! 🎉🎉 You've just turned your app into a fully featured instant messenger! Keep reading below to learn how to further customize the Chat SDK.
Next Steps
Check out the Development Guide
We've written a comprehensive Development Guide which is available in the docs repository.
If you thing that something is missing, you can post a new issue and we will update the guide.
We have a number of additional guides available on our Wiki.
Also checkout the other guides:
UI Customization
The Chat SDK is designed to be easily customizable. If you want to customize any of the activities you can do it using the ui api.
// You could define a custom LoginActivity subclass here
ChatSDK.ui().setLoginActivity(YourLoginActivity.class);

// Or customise the profile fragment
ChatSDK.ui().setProfileFragmentProvider(user -> YourProfileFragment.newInstance(user));
Every activity and fragment can be customized this way.
Configuration
The Chat SDK can be customized during setup using the configuration builder object. For a full list of options, take a look at here.
Configuration using the Configuration Builder
In your main onCreate method you create a new instance of the Configuration.Builder and pass it to the ChatSDK singleton on initialization.
Here you have the option to set far more properties. For example:
Disable Facebook and Twitter login
builder.facebookLoginEnabled(false);
builder.twitterLoginEnabled(false);
Set a custom user name and avatar
builder.defaultUserName("TestUser");
builder.defaultUserAvatarUrl("http://your-site/image.png");
Remember that in the instructions we will advise you to configure using the Android Manifest but you are always free to use the direct configuration method instead.
Module Setup
There are a number of free and premium extensions that can be added to the Chat SDK.
Firebase Modules
For the following modules:
- Firebase File Storage (free)
- Firebase Push Notifications (free)
- Firebase Social Login (free)
- Fireabse UI (free)
- Typing indicator
- Read receipts
- Location based chat
- Audio messages
- Video messages
- Contact book integration
The free modules are located in the main Github repository. The premium modules can be purchased and downloaded from the links provided above.
Firebase UI
Add the library
Add the following to your build.gradle
compile 'co.chatsdk.chatsdk:chat-sdk-firebase-ui:4.8.3'
Enable the module
Add the following to the end of your onCreate method:
FirebaseUIModule.activate(context, GoogleAuthProvider.PROVIDER_ID, PhoneAuthProvider.PROVIDER_ID);
You can provide a list of providers as outlined in the Firebase documentation.
Note You will need to remove the
com.facebook.sdk.ApplicationIdmeta data from the app manifest or you will get a Gradle build error.
Social Login
Add the following to your build.gradle
Add the library
Gradle
compile 'co.chatsdk.chatsdk:chat-sdk-firebase-social-login:4.8.3'
compile project(path: ':chat-sdk-firebase-social-login')
Enable the module
In your main class onCreate method add:
FirebaseSocialLoginModule.activate(getApplicationContext());
- On the Facebook developer site get the App ID and App Secret
- Go to the Firebase Console and open the Auth section
- On the Sign in method tab, enable the Facebook sign-in method and specify the App ID and App Secret you got from Facebook.
- Then, make sure your OAuth redirect URI (e.g.
my-app-12345.firebaseapp.com/__/auth/handler) is listed as one of your OAuth redirect URIs in your Facebook app's settings page on the Facebook for Developers site in the Product Settings > Facebook Login config -
Add the following to your
AndroidManifest.xml:<meta-data android:name="com.facebook.sdk.ApplicationId" android:value="@string/facebook_app_identifier"/>Add the following to your
chat_sdk_firebase.xmlfile:<string name="facebook_app_identifier">[FACEBOOK APP KEY]</string> -
Go back to the Facebook site and click "Add Platform". Choose Android and enter your Bundle ID. Then you will need to enter add the Key Hashes property. To do this first generate a key store for your app. Then generate the hash by running the following on MacOS:
keytool -exportcert -alias <RELEASE_KEY_ALIAS> -keystore <RELEASE_KEY_PATH> | openssl sha1 - binary | openssl base64On Windows, use:
keytool -exportcert -alias <RELEASE_KEY_ALIAS> -keystore <RELEASE_KEY_PATH> | openssl sha1 -binary | openssl base64
- Register your app as a developer application on Twitter and get your app's API Key and API Secret.
- In the Firebase console, open the Auth section.
- On the Sign in method tab, enable the Twitter sign-in method and specify the API Key and API Secret you got from Twitter.
- Then, make sure your Firebase OAuth redirect URI (e.g.
my-app-12345.firebaseapp.com/__/auth/handler) is set as your Callback URL in your app's settings page on your Twitter app's config. -
Add the following to the configuration where you initialize the Chat SDK:
config.twitterLogin("consumer key", "consumer secret");
-
If you haven't yet specified your app's SHA-1 fingerprint, do so from the Settings page of the Firebase console. See Authenticating Your Client for details on how to get your app's SHA-1 fingerprint.
keytool -exportcert -alias [KEY ALIAS] -keystore [PATH/TO/KEYSTORE] -list -vNote: You may need to add multiple keys for debug and release
- In the Firebase console, open the Auth section.
- On the Sign in method tab, enable the Google sign-in method and click Save.
- You must pass your server's client ID to the requestIdToken method. To find the OAuth 2.0 client ID.
- Open the Credentials page in the API Console.
- The Web application type client ID is your backend server's OAuth 2.0 client ID.
-
Add the following to the configuration where you initialize the Chat SDK:
config.googleLogin("web client key");
Social login can also be enabled or disabled by changing the Chat SDK configuration.
Other Modules
For the following modules:
- Keyboard overlay
- Sticker messages
- Contact book integration
- Typing indicator
- Read receipts
- Location based chat
- Audio messages
- Video messages
- Contact book integration
After you have purchased the module you will be provided with a link to the module source code. Unzip this file and import it into Android Studio.
- Click File -> New -> Import Module
-
Add the module to your
build.gradlecompile project(path: ':chat_sdk_[module name]') -
Sync Gradle
-
In your main class
onCreateactivate the module:ContactBookModule.activate();
Adding Modules Manually
In Android Studio:
File -> New -> Import Module
You must import the following core module:
chat-sdk-ui
And at least one network adapter:
chat-sdk-firebase-adapterchat_sdk_xmpp_adapter- Available here
And any of the following optional modules:
chat-sdk-firebase-file-storagechat-sdk-firebase-pushchat-sdk-firebase-social-loginchat-sdk-audio-message- Available herechat-sdk-video-message- Available herechat-sdk-sticker-message- Available herechat-sdk-read-receipts- Available herechat-sdk-typing-indicator- Available herechat-sdk-contact-book- Available here
Now import the modules in your build.gradle file.
compile project(path: ':chat-sdk-ui')
compile project(path: ':chat-sdk-firebase-push')
If you want to import modules manually, you should add the following to your gradle.properties file:
useLocal=true
You will also need to make sure that you've included the library versions in your main project level build.gradle file by adding the following:
ext {
    bintrayVersion = "1.8.4"
    mavenGradleVersion = "2.1"
    androidxAppcompatVersion = "1.0.2"
    androidxConstraintLayoutVersion = "2.0.0-alpha5"
    androidxLifecycleExtensionsVersion = "2.0.0"
    androidxRecyclerViewVersion = "1.0.0"
    androidxMultidexVersion = "2.0.1"
    materialVersion = "1.0.0"
    playAuthVersion = "16.0.1"
    playMapsVersion = "16.1.0"
    googlePlacesVersion = "1.1.0"
    playLocationVersion = "16.0.0"
    firebaseUiVersion = "4.3.2"
    firebaseCoreVersion = "16.0.9"
    firebaseDatabaseVersion = "17.0.0"
    firebaseAuthVersion = "17.0.0"
    firebaseStorageVersion = "17.0.0"
    firebaseMessagingVersion = "18.0.0"
    firebaseFunctionsVersion = "17.0.0"
    firebaseIIDVersion = "18.0.0"
    timberVersion = "4.7.1"
    greenDaoVersion = "3.2.2"
    frescoVersion = "1.13.0"
    rxJavaVersion = "2.2.8"
    rxAndroidVersion = "2.1.1"
    gsonVersion = "2.8.5"
    jodaTimeVersion = "2.10.1"
    jodaConvertVersion = "2.2.0"
    apacheCommonsVersion = "3.8.1"
    compressorVersion = "2.1.0"
    okHttpVersion = "3.11.0"
    facebookLoginVersion = "4.38.1"
    twitterVersion = "3.3.0"
    prettyTimeVersion = "4.0.1.Final"
    countryPickerVersion = "2.0.0"
    imageCropperVersion = "2.8.0"
    photoViewVersion = "2.3.0"
    materialDrawerVersion = "6.1.2"
    androidDatabaseSQLCipher = "4.1.3@aar"
    matisseVersion = "0.5.2-beta4"
    speedDial = "2.0.1"
}
This will prompt the modules to use local versions of the core Chat SDK modules rather than the versions hosted on Gradle.
Configuring the project
Now that the modules have been added, we need to configure the project.
SDK Version
Now you will see that gradle cannot be sync because it missing some parameters. Open to gradle.properties file in the root of the project and make sure the following lines are set to the latest values.
MIN_SDK = 16
ANDROID_BUILD_TARGET_SDK_VERSION = 25
ANDROID_COMPILE_SDK_VERSION = 28
ANDROID_SUPPORT_VERSION = 28.0.0
Note: You should make sure that the correct SDK versions and build tools are installed in Android Studio. To do this open the Preferences panel and navigate to Appearance & Behavior -> System Settings -> Android SDK or click on the SDK Manager icon in the tool bar. Android SDK versions 4.4 and onwards should be installed. Android SDK Build-Tools version 21.1.0 should be installed.
Add any other modules that you need. Then sync the project with gradle.
Backend agnostic architecture
The user interface for the Chat SDK is completely decoupled from the backend. This means that the Chat SDK can be adapted to connect to any type of messaging server by creating a custom network adapter. Currently we have written two network adapters, one for Firebase and another for XMPP. This has a number of benefits:
-
You can connect the Chat SDK user interface to your messaging server by writing a custom network adapter. This saves you the complex job of building a full user interface.
-
You can switch the backend your app uses. Imagine that you decide to start off with the Firebase version of the Chat SDK but at some point you decide that you want to switch to using an XMPP server. Usually, this would require a full rewrite of the messaging client but with the Chat SDK it can be achieved by changing one line of code!
If you want more details about writing a custom network adapter you can email us at team@sdk.chat.
The license
We offer a choice of two license for this app. You can either use the Chat SDK license or the GPLv3 license.
Most Chat SDK users either want to add the Chat SDK to an app that will be released to the App Store or they want to use the Chat SDK in a project for their client. The Chat SDK license gives you complete flexibility to do this for free.
Chat SDK License Summary
- License does not expire.
- Can be used for creating unlimited applications
- Can be distributed in binary or object form only
- Commercial use allowed
- Can modify source-code but cannot distribute modifications (derivative works)
If a user wants to distribute the Chat SDK source code, we feel that any additions or modifications they make to the code should be contributed back to the project. The GPLv3 license ensures that if source code is distributed, it must remain open source and available to the community.
GPLv3 License Summary
- Can modify and distribute source code
- Commerical use allowed
- Cannot sublicense or hold liable
- Must include original license
- Must disclose source
What does this mean?
Please check out the Licensing FAQ for more information.